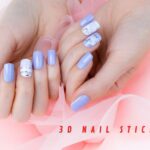
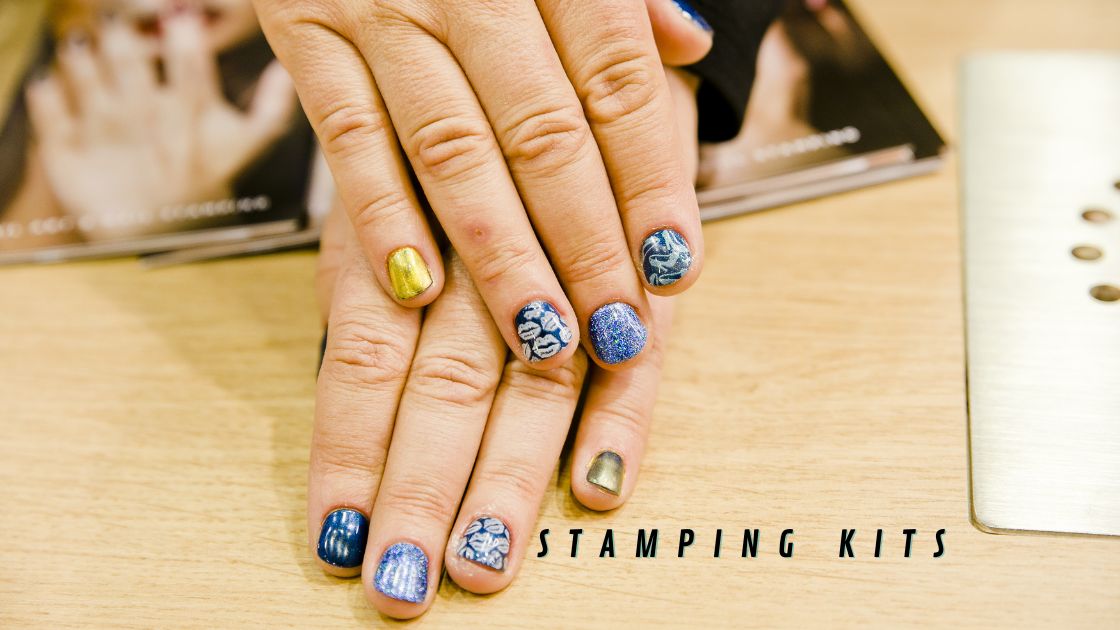
If you love nail art but find it hard to make it all the way to the salon, stamping kits are a fantastic solution to keep your nail game strong. Over the past few years, nail stamping, which is a form of nail art, has gained popularity. If you think you could benefit from nail stamping, here we’ll tell you how to use stamping kits.
If you have recently become interested in nail stamping, stamping kits offer you everything you need to get creative and bring your nails to the next level easily and quickly. Nail stamping is in no way intimidating or just like it sounds; you use a stamp to create amazing designs and prints on your fingernails, whether they are artificial or real.
Among the reasons why so many are looking into these kits for creative designs is the ease of using them. In a matter of a few minutes, you can have your nails done and be out the door. Stamping kits are great for those looking to rock serious nail art but have the time or skill to go to a salon.
As you can tell, stamping kits are simply practical and highly beneficial. If you also want to join millions on this fantastic trend and rock perfect nails at all times but have no idea where to start or how to use stamping kits, say no more. Continue reading, and we’ll tell you all about stamping kits and more interesting tips.
Stamping Kits Explained
It is still a new nail art technique, but it’s growing in popularity because of its simple application. Nail stamp designs are the perfect solution for anyone who is not skilled with freehand nail art. You can create beautiful DIY nail art right at home.
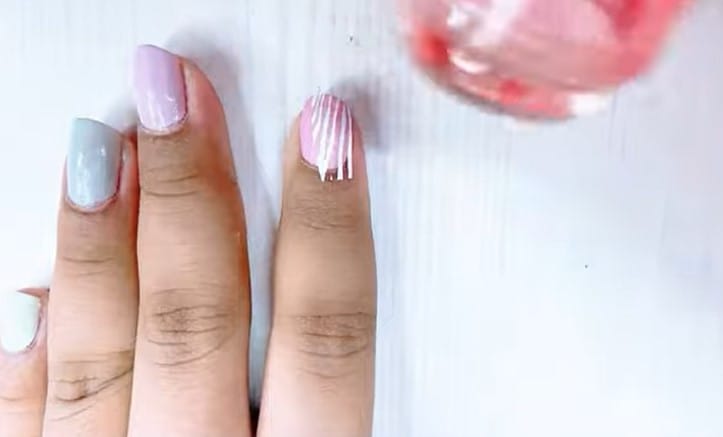
To use a nail stamp, you simply choose a design template, add a coat of colorful polish over the design, then press the stamper firmly on the template allowing it to pick up the artwork.
Stamping kits polish Vs. Regular polish
The polish of the stamping kits is brighter, allowing you to see the design because of its thicker and opaque formula. Regular polish is thinner, and you can see the base color through the stamp.
The design doesn’t stand out in comparison. The main difference between stamping polish and regular polish is the formula. The thick consistency and pigmentation make stamping polish very unique and designed for stamping.
How to Use Stamping Kits Steps
Step 1 Prep your nails
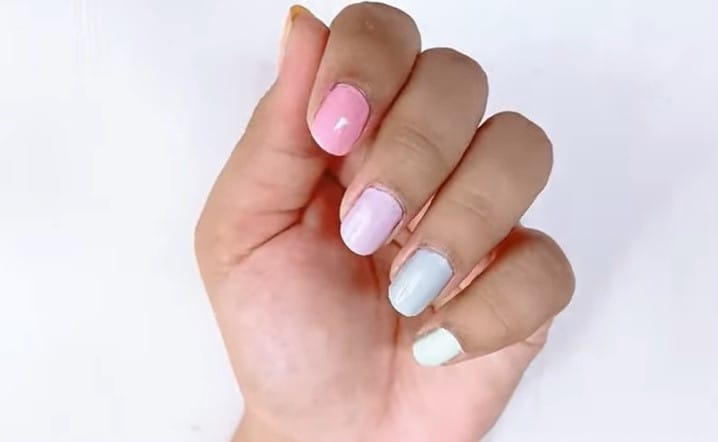
Start with painted and fully dried nails. Start with a base coat and end with a top coat on top of your colors. Use a toothpick to take off polish strayed into your nail’s side.
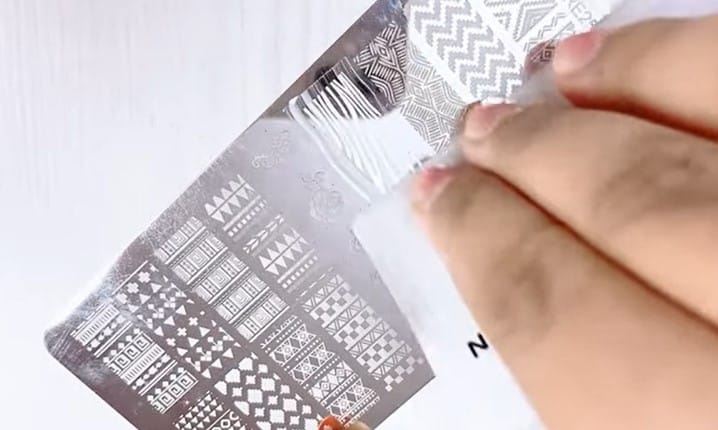
Step 2 Prep your stamper
Hold the stamping plate in place on a flat surface and paint the polish over the chosen design. Using the scraper, immediately scrape over the polish at a 45-degree angle to remove the excess lacquer from the plate.
Step 3 Stamp your nail
Pick up the polish with the stamper by pushing it down firmly onto the plate. Before you stamp, hover the stamper above your nail and eyeball where you want it to appear on the nail.
A smaller stamping head makes it easier to aim where you want to place small shapes. With a rolling motion, press the stamper onto the stamp plate to transfer the design to the stamper. Stamp onto the desired nail also using a rolling motion.
Step 4 Clean up
Use tape to pull off any stamped polish that got on your skin (it works like magic).
Use acetone with a cotton pad to clean up your plate between each stamping.

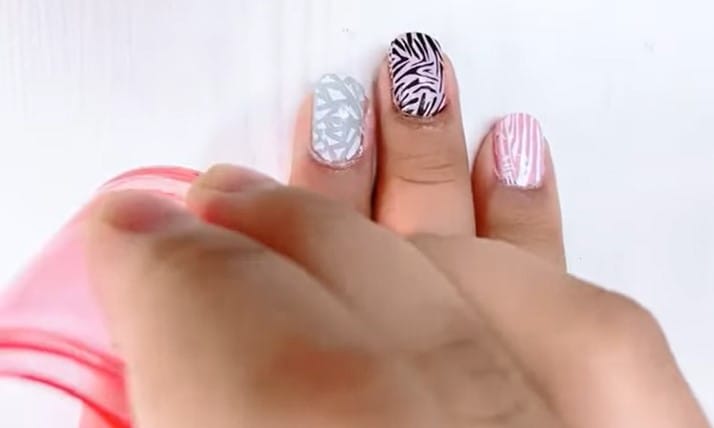
Step 5 Finish your other nails
Stamp similar designs on your other nails, but switch up each placement for more visual interest. Repeat the process on the rest of the nails. Then, clean up any part of the design that transferred onto the skin.
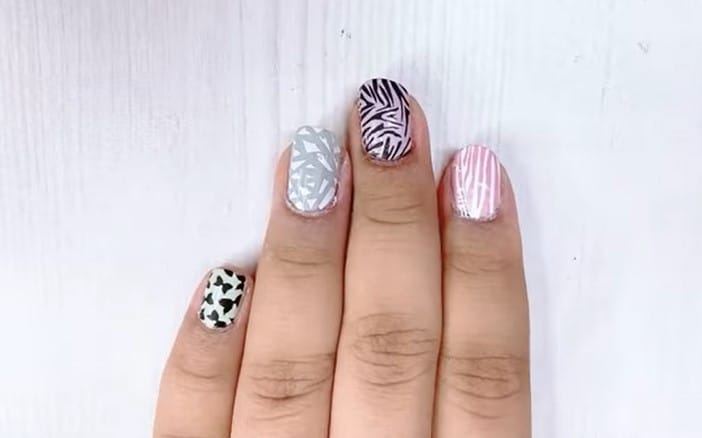
Step 6 Seal the design
Finish with another layer of top coat over the entire design. Carefully seal the design with a top coat. Use a light touch and float the top coat over the nail to prevent smudging the design.
Best Stamping Kits
PUEEN Nail Art Stamp Collection Set
[amazon box=”B00R1Z02GO” class=”lp-product-list” template=”vertical” image_size=”large” title=” ” price=” ” image_alt=”PUEEN Nail Art Stamp Collection Set” description=”none” button_text=”Check Latest Price” ]
PUEEN Nail Art Stamping Image Plates were designed and created from the ground up to introduce exciting new designs to nail art stamping. They are unique, and no other nail art image plates look like them.
Each plate measures about 1.8″ (5.5cm in diameter) with sanded edges for easy, comfortable handling and a protective nylon screen.
All image plates are made from high-grade stainless steel and paper-backed to prevent scratching during storage. This fantastic collection of plates comes with 24 plates, each containing six designs per plate.
What Our Testers Say
I love these stamping plates! They are well made, and there are so many great designs in this collection of plates. They work so well!
Ejiubas Double Side Stamping Kit
[amazon box=”B0B5YZB4FS” class=”lp-product-list” template=”vertical” image_size=”large” title=” ” price=” ” image_alt=”alttexthere” description=”none” button_text=”Check Latest Price” ]
This nail stamping kit has three stamping plates, one clear nail stamper and a scraper, a variety of nail templates, and more designs; you can choose any nail plate to make a good nail design with the stamper that you want.
All the nail stamps are Double-sided designs, with Lesser Spaces, Etched deep enough to hold enough polish for a beautiful opaque stamping nail art result, sandy edges, and no hurting.
The white Nail Art Stamper is super easy to hit the desired location on your nails & save polish thanks to accurate stamping.
What Our Testers Say
I love this set of polishes! It’s very easy to use and comes with a glossy, matte top polish and base polish. It’s super glossy, which I love, and the colors are BEAUTIFUL.
Nail Stamper Kit Nail Stamping Plate Set
[amazon box=”B08G8TQ4Z4″ class=”lp-product-list” template=”vertical” image_size=”large” title=” ” price=” ” image_alt=”Nail Stamper Kit Nail Stamping Plate Set” description=”none” button_text=”Check Latest Price” ]
Lasting and easy to operate, the nail art stamps stencils with polishing finish are durable and reusable to apply.
Fit for most sizes of nails, the white silicone allows you to pick up the patterns from the plate easily and flexibly; you just need to enjoy the crafting process together with your family.
The Stamping Plates have etched deep enough to hold enough polish for a beautiful opaque stamping result. With these reusable nail plates, you can get creative with your favorite nail designs.
What testers say: I highly recommend this since you have colors that work well for all complexions and seasons. It’s a set to build your polish collection as well.
SHANY Nail Art Polish Stamp Manicure Set
[amazon box=”B004DK0UDA” class=”lp-product-list” template=”vertical” image_size=”large” title=” ” price=” ” image_alt=”SHANY Nail Art Polish Stamp Manicure Set” description=”none” button_text=”Check Latest Price” ]
SHANY Nail Art Polish Stamping Manicure Image Plates are an assortment of 25 image plates with cherry-picked styles, including intricate patterns, faces, cartoon characters, animals, words, Japanese words, Chinese letters, shapes, holiday designs, seasons, and more.
It features sanded edges for easy handling and a thin layer of protection on each plate; stainless steel image plates, light in weight, scratch resistance, 6 to 15 mark on each plate.
The set comes in a pack of 25, and each plate has its own protective layer; please be sure to remove the thin layer before using the product.
What Our Testers Say
Amazing range of stamps! On good quality plates! And plenty of them! Pity I didn’t know how to use these earlier on in the year!
[amazon box=”B08P2N383T” class=”lp-product-list” template=”vertical” image_size=”large” title=” ” price=” ” image_alt=”BORN PRETTY Nail Art Stamping Plates” description=”none” button_text=”Check Latest Price” ]
BORN PRETTY Nail Art Stamping Plates
The nail stamping polish is brilliant and fully opaque. The nice consistency allows you to make crisp, clear images and get a clean transfer when you pick up these colors.
Apply an appropriate amount of the nail polish on a stamping plate (nearly 1/3 of the image you want), and wipe the excess. This kit comes with an eight-piece stamping plate set. This is the ideal nail set for a great holiday gift for users of all ages.
Quickly pick up the color with a stamper. Then stamp it on your nails quickly. Seal it with no smudge top coat; your nails should last 14 days if applied correctly.
What Our Testers Say
This kit is fantastic, it creates beautiful french manicure designs, an easy-to-use jelly stamper, and a durable design means it lasts for years.
Stamping Kits Additional Tips
- Before starting, lay out all of your supplies. You don’t want the lacquer to dry on the plate while you’re looking for your stamper.
- Apply a base color and then add a layer of top coat, allowing it to dry before you stamp. If you make a mistake while stamping, use either tape or a lint-free wipe dipped in acetone to lightly remove the design from your nail without having to redo your base.
- Make cleanup faster by applying tape around your cuticle before stamping.
- Acetone can damage soft silicone stamping heads. Instead, use packing tape or a lint roller to quickly clean off old polish from your stamper.
- After stamping, give your nail a moment to dry. When you add the top coat, do so in as few strokes as possible and allow it to “float” over the design; don’t drag the brush. This can smear your design.
- Don’t scrape the plate too hard when using your scraper, as it can pull out too much polish from the engraving.
- Be sure to firmly press the stamper down onto the plate to pick up all the colors.
- If you’re having a tough time transferring large designs, turn your stamp into a decal. First, paint a thin layer of top coat on wax paper, let it dry, then stamp your design directly over top. Once dry, use tweezers to carefully remove the thin layer of polish from the paper and adhere it smoothly to the nail.
Common Question About Stamping Kits
Do you need special nail polish for the nail stamper?
The answer would be affirmative. That’s what being creative is all about, finding your way to express yourself. The stamping technique is exactly the same regardless of the type of polish you use.
What polish do you use for stamping?
Long-time nail stampers will know the struggle of finding a stamping nail polish that’s thick but not too thick. The viscosity of this nail polish is just right and offers an opaque finish that won’t fade away anytime soon.
What tools can you find in your stamping kits?
- A high-quality stamper is required for nail stamping, but it’s not the only tool you’ll need. Nail polish is a necessity, of course, for both your base coat and the nail art itself.
- Stamping kits or plates provide the art you’ll stamp on your nails, while scrapers get rid of excess polish for a cleaner design.
- Stampers can also lose stickiness with repeated use, which is why some sets come with replacement heads.
What are the advantages of using nail stamping kits?
- You will find that you save a ton of money having a nail art kit easy to use from home, no longer requiring you to spend time at the nail salon.
- In addition to saving money, you will also save yourself a lot of time, not having to schedule an appointment and wait to get your nails done.
- With a home nail stamping kit, you can change your nail designs as often as you want on your own.
- Having a DIY nail stamping kit will give you a great reason to spend time with your kids or make a memorable night with girlfriends.
How to care for your stamping kits?
- Nail stampers need to be cleaned before use, and the cleaning process can vary between products, so you’ll want to pay careful attention to what the manufacturers suggest for maintenance.
- Some brands recommend that you prime your nail stamper, which means you’ll prep it by smoothing the surface with a nail file before using it for the first time.
- Others also encourage you to clean nail stampers after each use by using acetone, but other makers caution that the harsh chemical can tarnish or wear away steel stampers.
What to keep in mind when selecting the best nail stamping tool?
- The best nail stamping kits or stamper for you has the right texture for your design; soft stampers are easier to use and therefore great for less precise styles, while firm stampers offer better control for people transferring intricate designs.
- You’ll also want to consider what size would make sense for your intended nail art since smaller nail stampers work well for placing dainty nail design elements, while bigger ones work best if you’re placing a design that will cover your entire nail.
- You can also choose a double-sided stamper that has two differently-sized heads.
- Clear stampers can be useful, but some stampers are only available in opaque designs, so you’ll need to weigh your priorities and decide if this matters to you.